PUN 2를 사용하여 네트워크를 통해 강체 동기화
PUN 2의 개체 동기화는 간단하지만 Rigidbodies 동기화는 어떻습니까?
일반 GameObject와 달리 Rigidbody은 중력(운동학이 아닌 경우) 및 기타 객체의 영향도 받습니다. 따라서 객체의 변환만 동기화하는 대신 velocity 및 angularVelocity와 같은 몇 가지 추가 매개변수도 동기화해야 합니다.
이 게시물에서는 룸에 있는 모든 플레이어의 영향을 받고 네트워크를 통해 동기화될 수 있는 대화형 Rigidbodies를 만드는 방법을 보여 드리겠습니다.
Unity 이 튜토리얼에서 사용된 버전: Unity 2018.3.0f2(64비트)
1부: PUN 2 및 멀티플레이어 예제 설정
PUN 2를 사용하여 멀티플레이어 예제를 설정하는 방법에 대한 튜토리얼이 이미 있습니다. 아래 링크를 확인하세요.
PUN 2를 사용하여 Unity 3D에서 멀티플레이어 게임 만들기
계속할 수 있도록 멀티플레이어 프로젝트 설정을 마친 후 다시 돌아오세요.
또는 여기에서 소스 프로젝트를 가져와 시간을 절약할 수 있습니다.
2부: 대화형 강체 추가
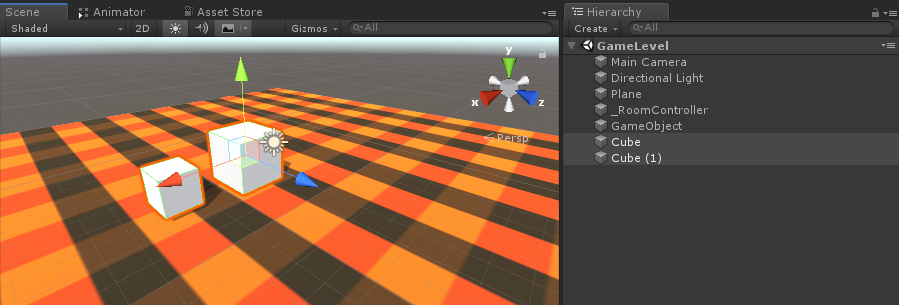
위의 튜토리얼을 따랐다면 이제 2개의 장면 "GameLobby"과 "GameLevel"
- "GameLevel" 장면을 열고 두 개의 큐브를 만듭니다(GameObject -> 3D Object -> Cube)
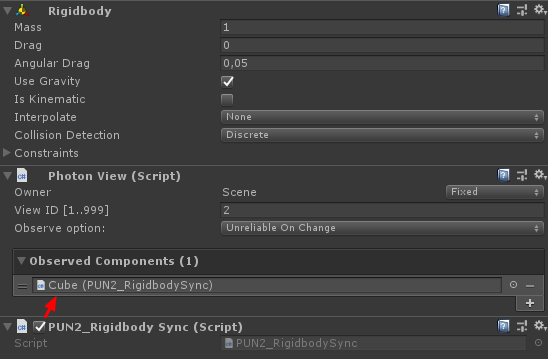
- 각 큐브에 Rigidbody 컴포넌트를 추가
- 각 큐브에 PhotonView 컴포넌트 추가
이제 네트워크를 통해 Rigidbodies를 동기화할 새 스크립트를 생성해야 합니다.
- 새 스크립트를 생성하고 이름을 PUN2_RigidbodySync로 지정하세요.
PUN2_RigidbodySync.cs
using UnityEngine;
using Photon.Pun;

public class PUN2_RigidbodySync : MonoBehaviourPun, IPunObservable
{

    Rigidbody r;

    Vector3 latestPos;
    Quaternion latestRot;
    Vector3 velocity;
    Vector3 angularVelocity;

    bool valuesReceived = false;

    // Start is called before the first frame update
    void Start()
    {
        r = GetComponent<Rigidbody>();
    }

    public void OnPhotonSerializeView(PhotonStream stream, PhotonMessageInfo info)
    {
        if (stream.IsWriting)
        {
            //We own this player: send the others our data
            stream.SendNext(transform.position);
            stream.SendNext(transform.rotation);
            stream.SendNext(r.velocity);
            stream.SendNext(r.angularVelocity);
        }
        else
        {
            //Network player, receive data
            latestPos = (Vector3)stream.ReceiveNext();
            latestRot = (Quaternion)stream.ReceiveNext();
            velocity = (Vector3)stream.ReceiveNext();
            angularVelocity = (Vector3)stream.ReceiveNext();

            valuesReceived = true;
        }
    }

    // Update is called once per frame
    void Update()
    {
        if (!photonView.IsMine && valuesReceived)
        {
            //Update Object position and Rigidbody parameters
            transform.position = Vector3.Lerp(transform.position, latestPos, Time.deltaTime * 5);
            transform.rotation = Quaternion.Lerp(transform.rotation, latestRot, Time.deltaTime * 5);
            r.velocity = velocity;
            r.angularVelocity = angularVelocity;
        }
    }

    void OnCollisionEnter(Collision contact)
    {
        if (!photonView.IsMine)
        {
            Transform collisionObjectRoot = contact.transform.root;
            if (collisionObjectRoot.CompareTag("Player"))
            {
                //Transfer PhotonView of Rigidbody to our local player
                photonView.TransferOwnership(PhotonNetwork.LocalPlayer);
            }
        }
    }
}- PUN2_RigidbodySync를 두 큐브 모두에 연결하고 Photon View "Observed Components"에도 할당합니다:
또한 멀티플레이어 튜토리얼의 PUN2_PlayerSync 스크립트를 일부 변경해야 합니다.
- PUN2_PlayerSync.cs 열기
- void Start()의 if(photonView.IsMine) 내부에 다음 코드를 추가하세요:
            //Player is local
            gameObject.tag = "Player";
            //Add Rigidbody to make the player interact with rigidbody
            Rigidbody r = gameObject.AddComponent<Rigidbody>();
            r.isKinematic = true;
이제 void Start()는 다음과 같아야 합니다.
    // Use this for initialization
    void Start()
    {
        if (photonView.IsMine)
        {
            //Player is local
            gameObject.tag = "Player";
            //Add Rigidbody to make the player interact with rigidbody
            Rigidbody r = gameObject.AddComponent<Rigidbody>();
            r.isKinematic = true;
        }
        else
        {
            //Player is Remote, deactivate the scripts and object that should only be enabled for the local player
            for (int i = 0; i < localScripts.Length; i++)
            {
                localScripts[i].enabled = false;
            }
            for (int i = 0; i < localObjects.Length; i++)
            {
                localObjects[i].SetActive(false);
            }
        }
    }
Rigidbody 구성 요소를 추가하면 플레이어 인스턴스가 다른 Rigidbody와 상호 작용할 수 있는지 확인하고 태그를 "Player"으로 변경하면 Rigidbody와 충돌한 로컬 인스턴스인지 여부를 감지할 수 있습니다.
- 모든 작업이 완료된 후 GameLevel Scene을 저장하세요.
이제 빌드를 하고 테스트해 봅시다!
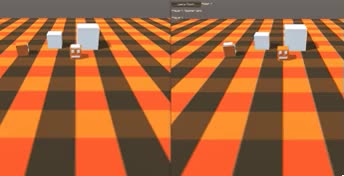
모든 것이 예상대로 작동합니다. 이제 Rigidbodies는 여전히 상호 작용하면서 네트워크를 통해 동기화될 수 있습니다.