Unity 마우스 클릭 시 객체를 생성하는 방법
이 튜토리얼에서는 Unity에서 마우스 클릭으로 객체를 생성하는 방법을 보여 드리겠습니다.
스크립트는 마우스 위치에 Prefabs를 생성하고 표면 법선에 정렬하는 작업을 처리합니다.
단계
- 새 스크립트를 만들고 SC_ClickSpawner라고 부르고 그 안에 아래 코드를 붙여넣습니다.
SC_ClickSpawner.cs
using System.Collections;
using System.Collections.Generic;
using UnityEngine;

public class SC_ClickSpawner : MonoBehaviour
{
    public GameObject[] prefabs; //Prefabs to spawn

    Camera c;
    int selectedPrefab = 0;
    int rayDistance = 300;

    // Start is called before the first frame update
    void Start()
    {
        c = GetComponent<Camera>();
        if(prefabs.Length == 0)
        {
            Debug.LogError("You haven't assigned any Prefabs to spawn");
        }
    }

    // Update is called once per frame
    void Update()
    {
        if (Input.GetKeyDown(KeyCode.Alpha1))
        {
            selectedPrefab++;
            if(selectedPrefab >= prefabs.Length)
            {
                selectedPrefab = 0;
            }
        }
        else if (Input.GetKeyDown(KeyCode.Alpha2))
        {
            selectedPrefab--;
            if (selectedPrefab < 0)
            {
                selectedPrefab = prefabs.Length - 1;
            }
        }

        if (Input.GetMouseButtonDown(0) && Input.GetKey(KeyCode.LeftShift))
        {
            //Remove spawned prefab when holding left shift and left clicking
            Transform selectedTransform = GetObjectOnClick();
            if (selectedTransform)
            {
                Destroy(selectedTransform.gameObject);
            }
        }
        else if (Input.GetMouseButtonDown(0))
        {
            //On left click spawn selected prefab and align its rotation to a surface normal
            Vector3[] spawnData = GetClickPositionAndNormal();
            if(spawnData[0] != Vector3.zero)
            {
                GameObject go = Instantiate(prefabs[selectedPrefab], spawnData[0], Quaternion.FromToRotation(prefabs[selectedPrefab].transform.up, spawnData[1]));
                go.name += " _instantiated";
            }
        }
    }

    Vector3[] GetClickPositionAndNormal()
    {
        Vector3[] returnData = new Vector3[] { Vector3.zero, Vector3.zero }; //0 = spawn poisiton, 1 = surface normal
        Ray ray = c.ScreenPointToRay(Input.mousePosition);
        RaycastHit hit = new RaycastHit();
        if (Physics.Raycast(ray, out hit, rayDistance))
        {
            returnData[0] = hit.point;
            returnData[1] = hit.normal;
        }

        return returnData;
    }

    Transform GetObjectOnClick()
    {
        Ray ray = c.ScreenPointToRay(Input.mousePosition);
        RaycastHit hit = new RaycastHit();
        if (Physics.Raycast(ray, out hit, rayDistance))
        {
            Transform root = hit.transform.root;
            if (root.name.EndsWith("_instantiated"))
            {
                return root;
            }
        }

        return null;
    }

    void OnGUI()
    {
        if(prefabs.Length > 0 && selectedPrefab >= 0 && selectedPrefab < prefabs.Length)
        {
            string prefabName = prefabs[selectedPrefab].name;
            GUI.color = new Color(0, 0, 0, 0.84f);
            GUI.Label(new Rect(5 + 1, 5 + 1, 200, 25), prefabName);
            GUI.color = Color.green;
            GUI.Label(new Rect(5, 5, 200, 25), prefabName);
        }
    }
}- SC_ClickSpawner 스크립트를 메인 카메라에 연결
- SC_ClickSpawner의 Prefabs 배열에 생성하려는 Prefabs를 할당합니다.
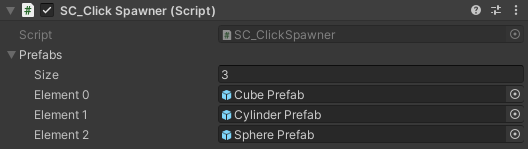
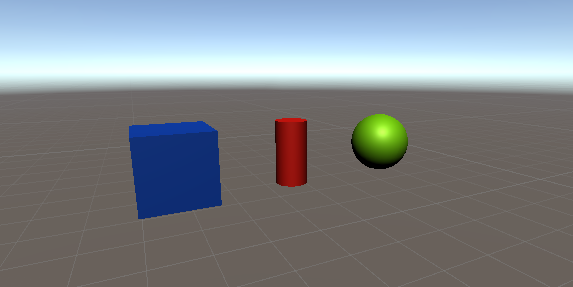
- 제 경우에는 간단한 모양을 사용하겠습니다.
팁: 생성된 프리팹이 표면에 "buried"되는 것을 방지하려면 해당 루트 변환(또는 단일 객체인 경우 피벗)이 맨 아래에 있는지 확인하세요.
- 기본 카메라를 표면 앞으로 이동
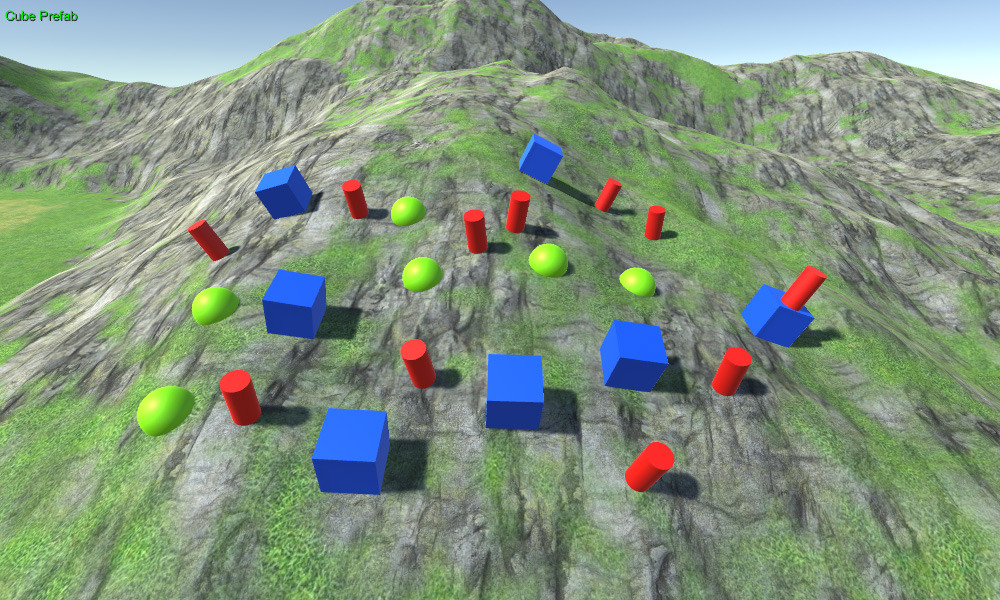
이제 Play를 누르면 표면을 마우스 왼쪽 버튼으로 클릭하여 개체를 생성하고 왼쪽 Shift + 왼쪽 클릭을 눌러 개체를 제거할 수 있습니다.
'1'를 누르면 목록에서 다음 프리팹이 선택되고 '2'을 누르면 이전 프리팹이 선택됩니다.